-
Notifications
You must be signed in to change notification settings - Fork 17
initialize instance manually
In order to configure the services, we need technical users for the following components:
-
Gitlab
-
Nexus3
-
SonarQube
The following sections describe how to configure the components to enable technical users and tokens.
The creation of the GitLab Group and Project will require a private GitLab token which has to be created manually. The token can be obtained like this:
-
Go to your Profile in Gitlab

-
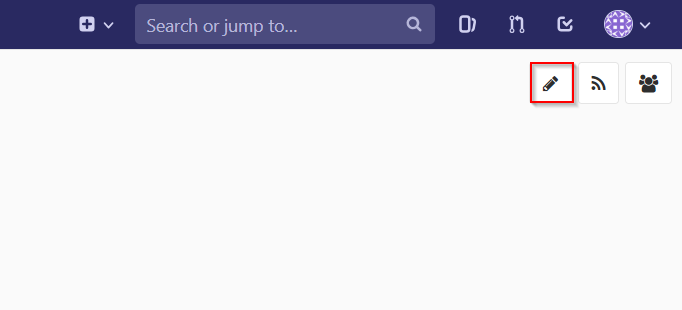
Next click on the pen icon
-
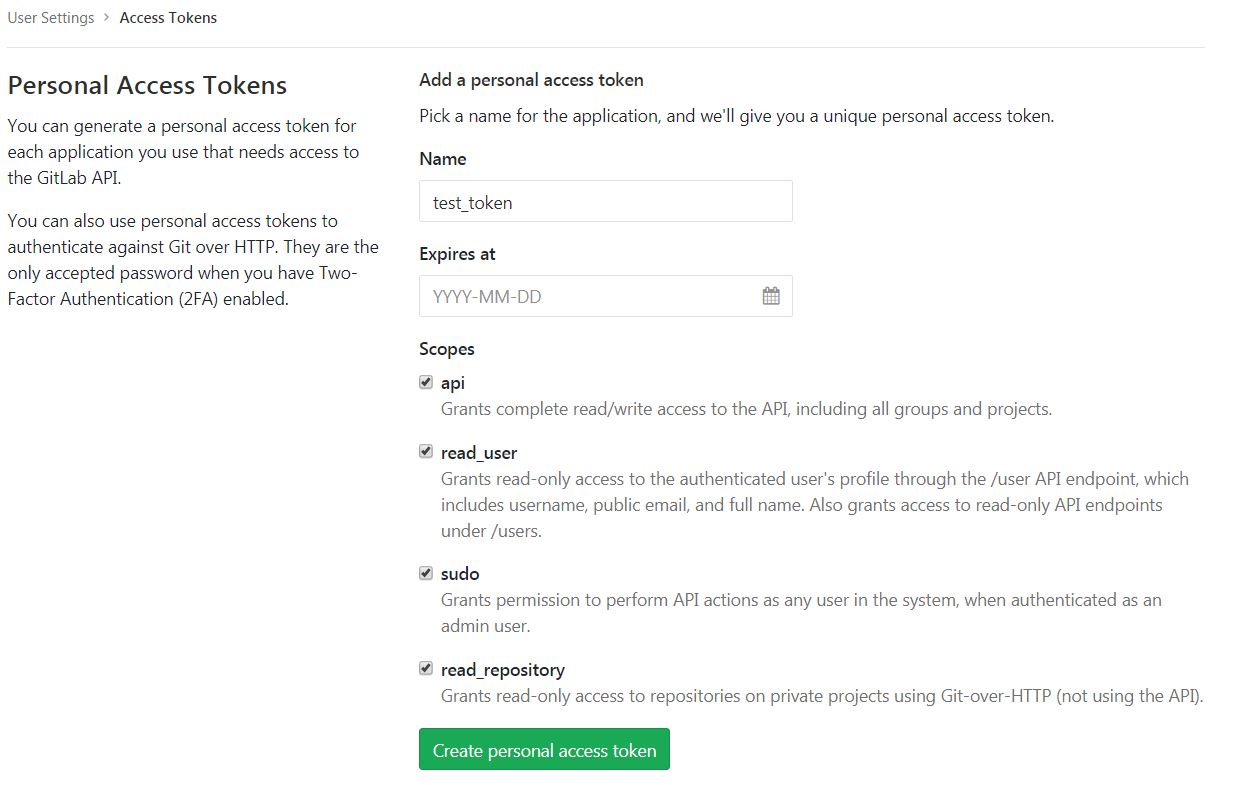
On the left menu choose Access Tokens and put token name and check fields like below
-
Click "Create personal access token", you should receive notification about created token and token string. Copy the token string.

|
❗
|
The GitLab API user needs to have API access and the rights to create a new group. To set this permission follow the next steps: |
-
Enter the Admin control panel
-
Select 'Users'
-
Select the user(s) in question and click 'Edit'
-
Scroll down to 'Access' and un-tick 'Can Create Group'
Nexus3 is used to store build artifacts such as the frontend and the backend. In the future it might also be used to store docker images of MTS.
-
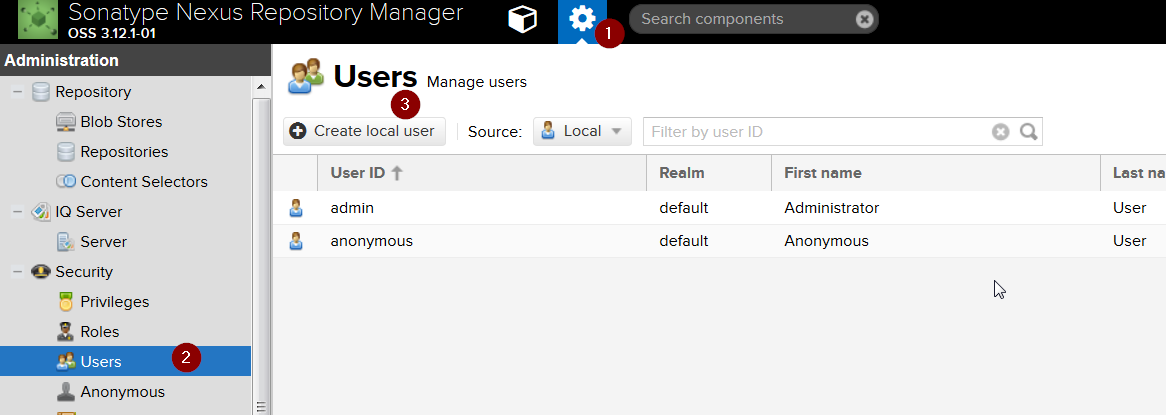
The nexus3-api user should be created in section Administration
-
New user should have added roles: Admins, nx-admins
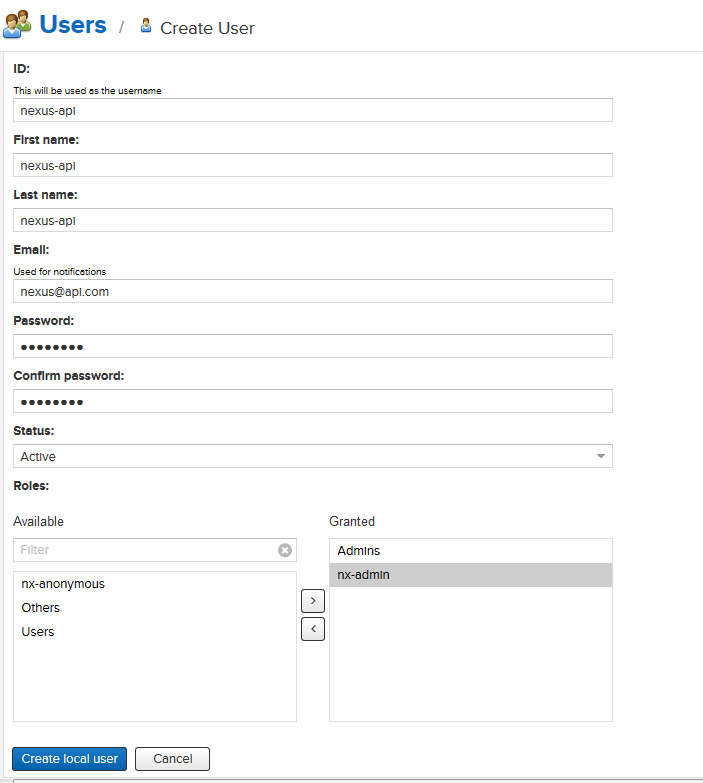
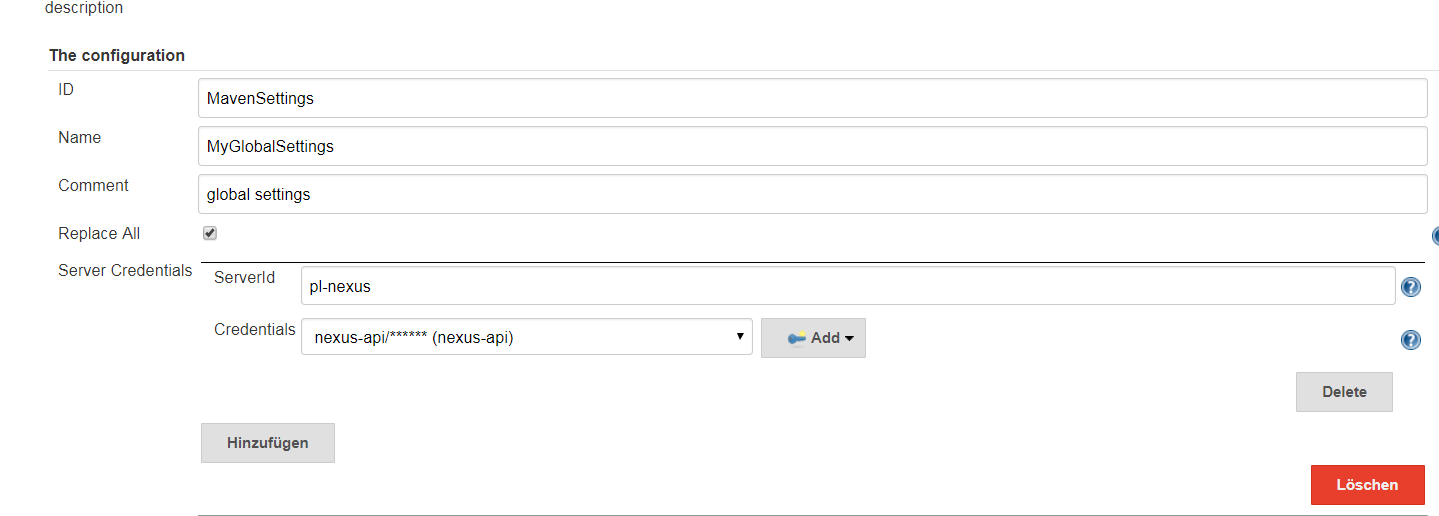
Credentials 'nexus-api' user should be added to Jenkins Jenkins → Credentials → System → Global credentials (unrestricted) → Add Credentials

-
Install required plugins:
HTTP Request Plugin
Allure Jenkins Plugin -
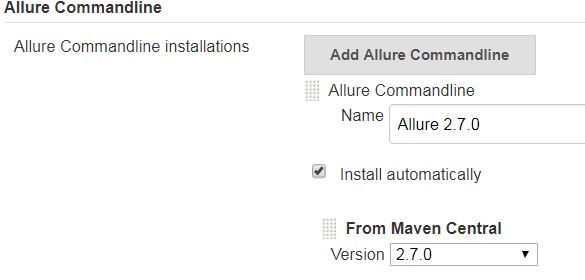
In Jenkins Global Tool Configuration configure Allure Commandline and Maven like
-
Go to SonarQube.
-
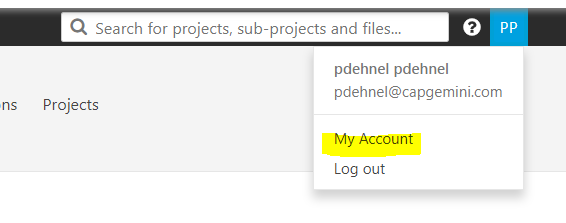
Go to your account.
-
Go to Security tab.
-
Generate the token.
In order to analyze devonfw projects in SonarQube properly, you need to install manually some plugins. To do that you only need to open your SonarQube website and go to Administration → Marketplace. Then, you need to install the following plugins:
-
Checkstyle
-
Cobertura
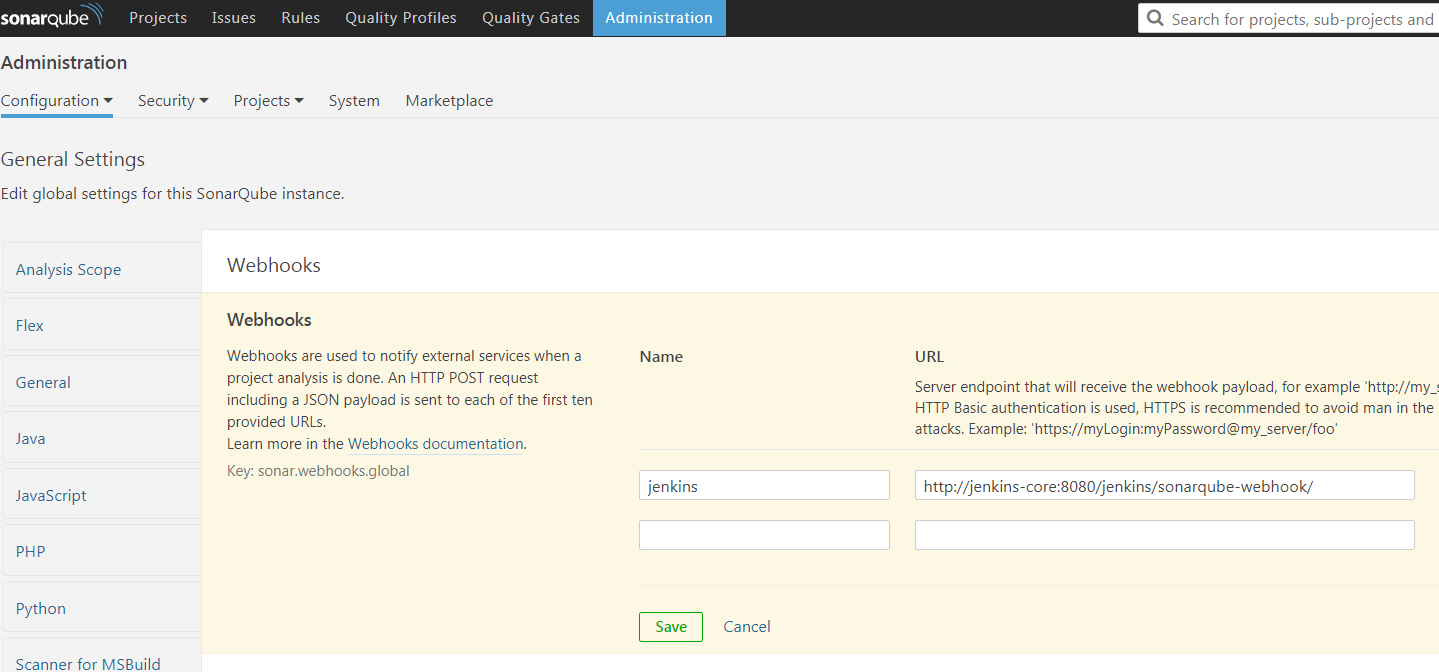
A part of the Build Job will ask SonarQube if the quality gate has been passed. For this step a so called "webhook" has to be configured in SonarQube. To do so,
-
Go to SonarQube
-
Select 'Administration'
-
Select 'Configuration', 'General Settings' and select 'Webhooks' in the left menu
-
Add the following webhook
-
Press 'Save'
-
-
devonfw Technologies Templates
-
Utility Templates
-
MrChecker
-
Samples
-

