-
Notifications
You must be signed in to change notification settings - Fork 14
dsf openshift services bitbucket basic server setup
[Under construction]
The purpose of the present document is to provide the basic steps carried out to setup a BitBucket server in OpenShift.
BitBucket is the Atlassian tool that extends the Git functionality, by adding integration with JIRA, Confluence, or Trello, as well as incorporates extra features for security or management of user accounts (See BitBucket).
BitBucket server is the Atlassian tool that runs the BitBucket services (See BitBucket server).
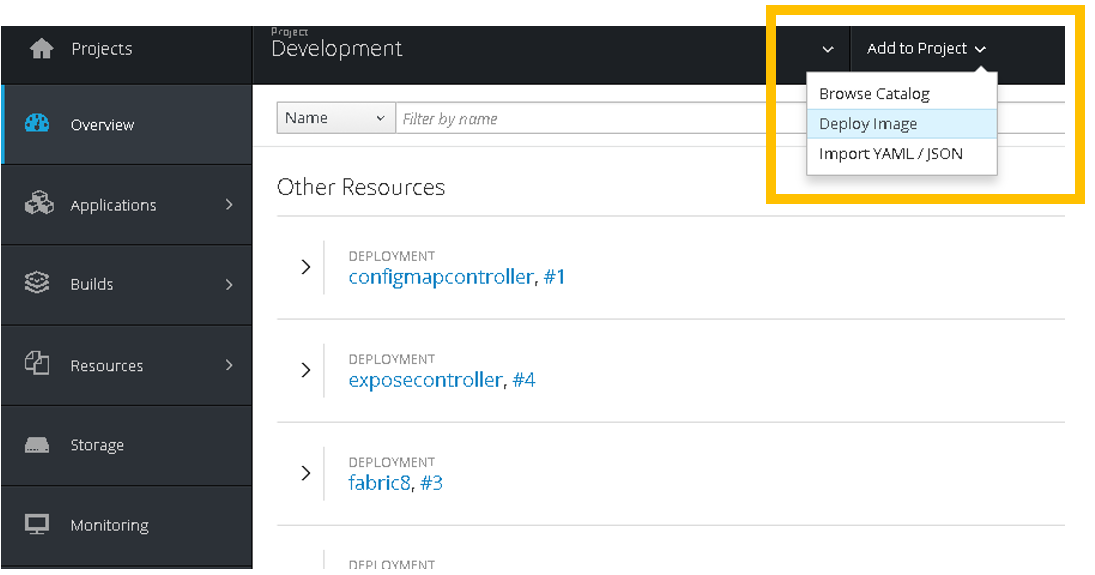
The followed approach has been not using command line, but OpenShift Web Console, by deploying the Docker image atlassian/bitbucket-server (available in Docker Hub) in the existing project Deployment.
The procedure below exposed consists basically in three main steps:
-
Deploy the BitBucket server image (from OpenShift web console)
-
Add a route for the external traffic (from OpenShift web console)
-
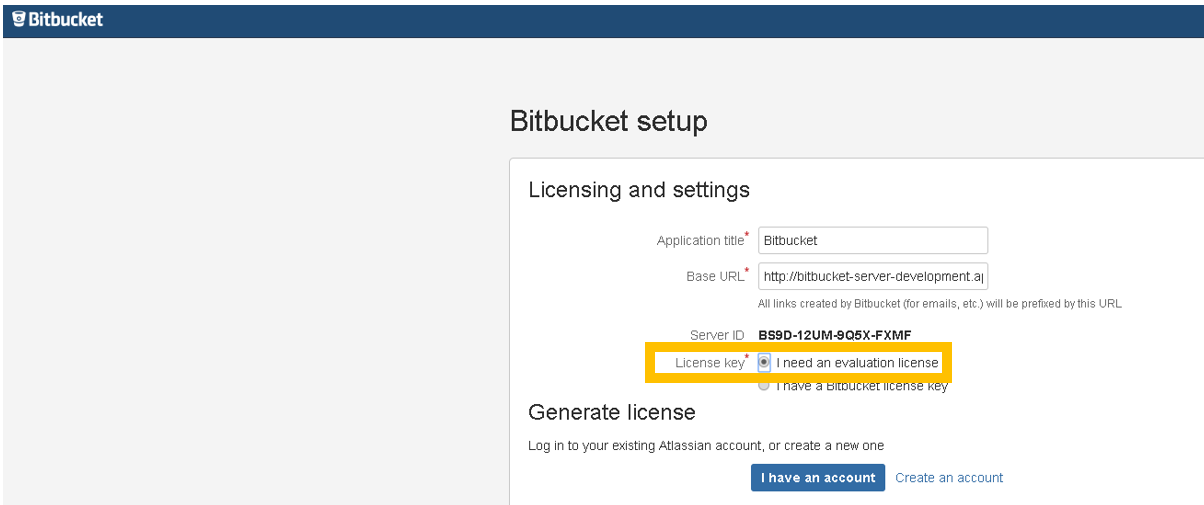
Configure the BitBucket server (from BitBucket server web console)
-
OpenShift up & running
-
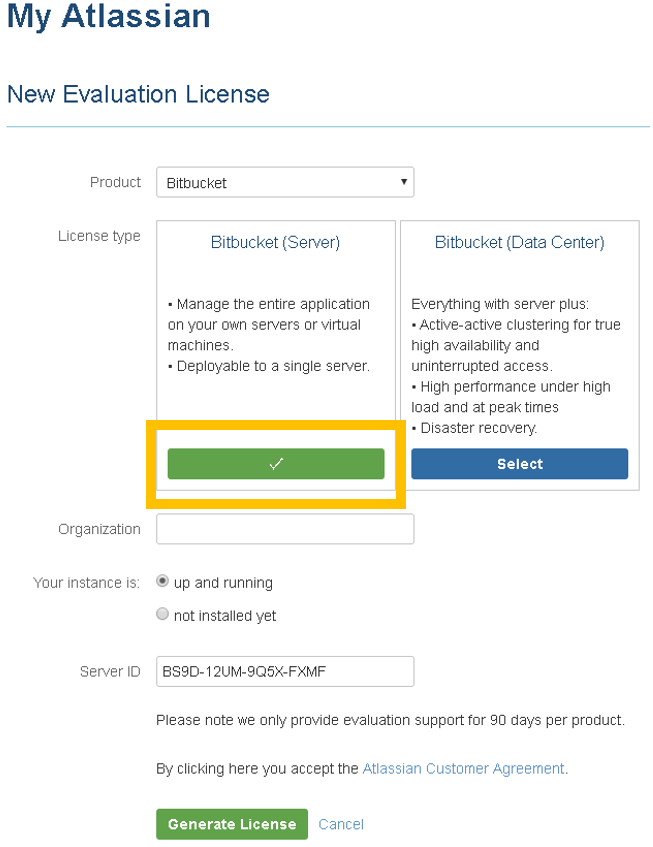
Atlassian account (with personal account key). Not required for OpenShift, but for the initial BitBucket server configuration.
Step 0: Log into our OpenShift Web console

Step 2.2: Introduce the image name (available in Docker Hub) and search
Image name: atlassian/bitbucket-server

Step 2.3: Leave by the moment the default config. since it is enough for the basic setup. Press Create
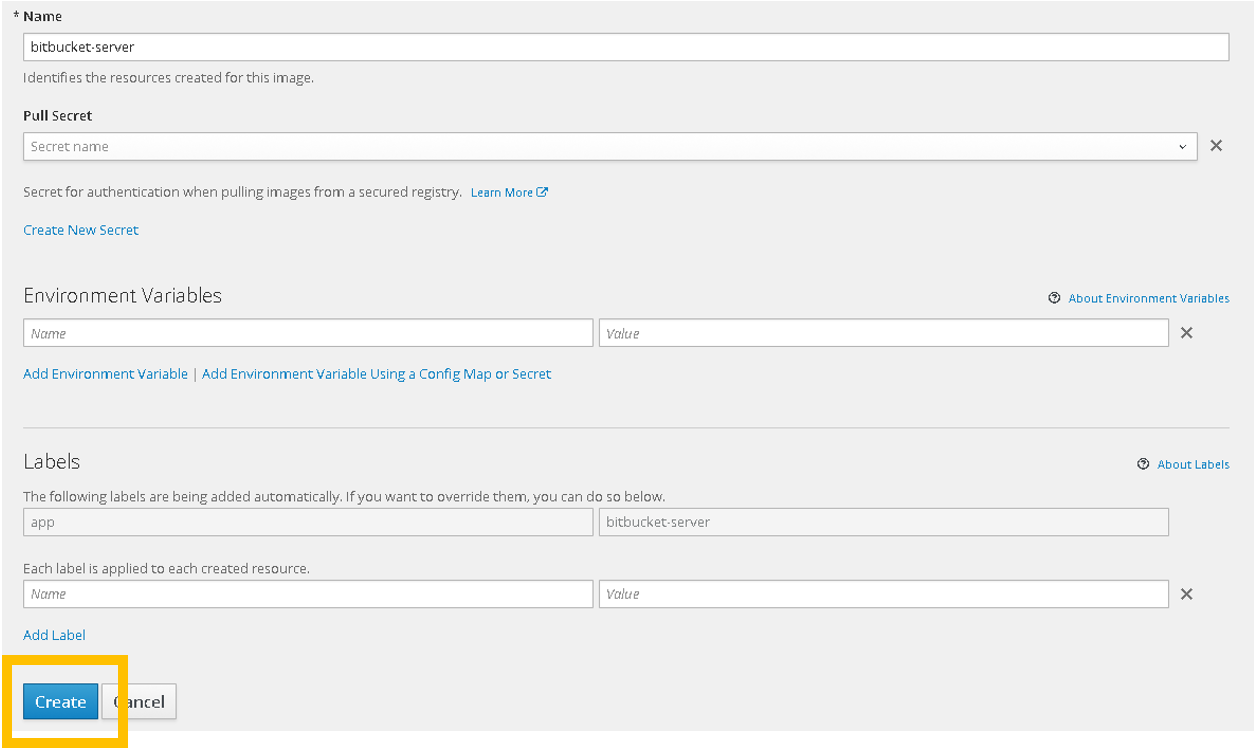
Please notice that there are no pre-configured routes, hence the application is not accessible from outside the cluster.

Step 3: Create a route in order for the application to be accessible from outside the cluster (external traffic). Press Create
Please notice that there are different fields that can be specified (hostname, port). If required, the value of those fields can be modified later.
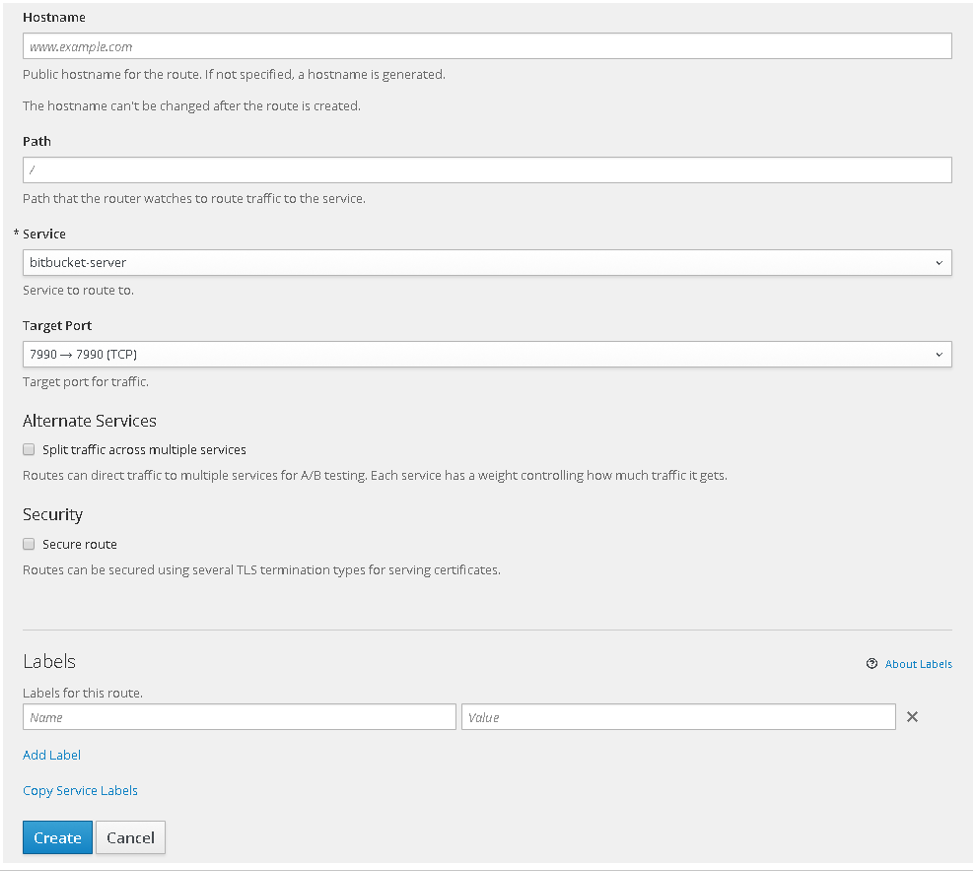
Leave by the moment the default config. as it is enough for the basic setup.
The route for external traffic is now available.

Now the BitBucker server container is up & running in our cluster.
The below steps correspond to the basic configuration of our BitBucket server.
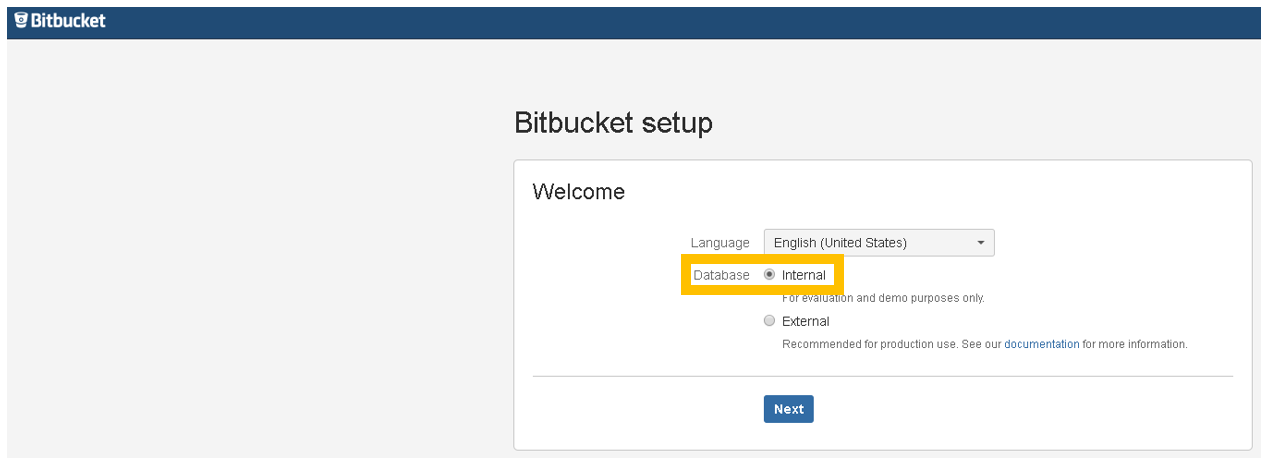
Step 4.2: Leave by the moment the Internal database since it is enough for the basic setup (and it can be modified later), and click Next
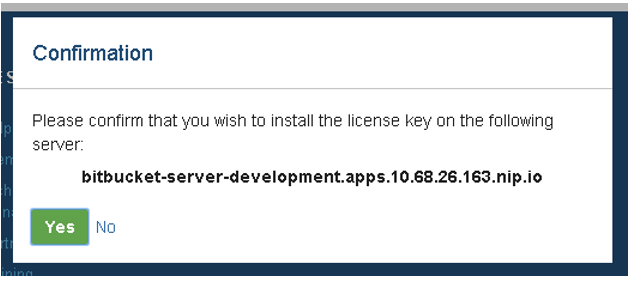
The license key will be automatically generated. Click Next
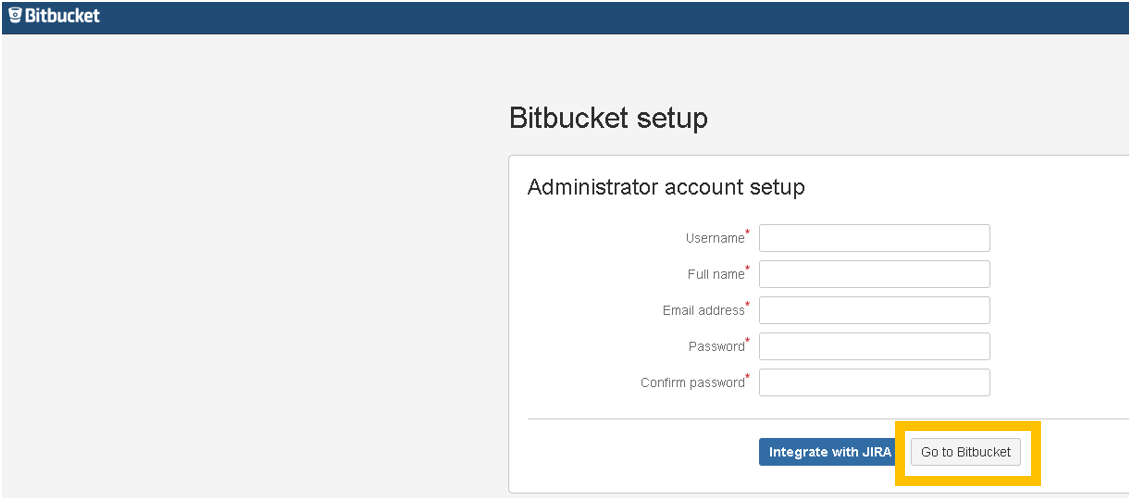
Since our BitBucket server is not going to be integrated with JIRA, click on Go to Bitbucket. The integration with JIRA can be configured later.
This documentation is licensed under the Creative Commons License (Attribution-NoDerivatives 4.0 International).
-
cicd configuration
-
Manual configuration
-
Automatic configuration
-
-
Custom Services
-
Azure DevOps
![]](./images/others/bitbucket/step1.png)
