-
Notifications
You must be signed in to change notification settings - Fork 4
CppUTest tests step by step
A step-by-step guide to setup and run CppUTest tests with NetBeans.
For a faster guide using the file wizard see: CppUTest tests the easy way
Setup CppUTest as described here.
Create a new C/C++ Project:
New Project -> C/C++ -> Select a project type
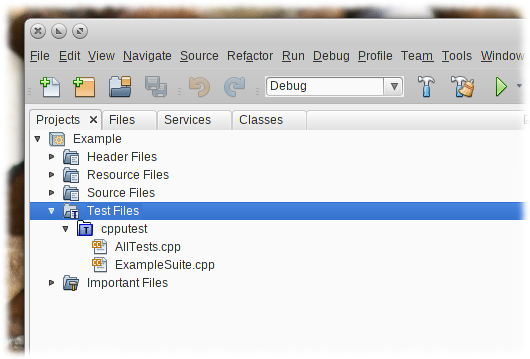
Optional: Create a test folder / logical folder within Test Files.
In this example, a test folder cpputest is used.
As other libraries, CppUTest has to be added to the NetBeans project. This includes:
- Include path (
<cpputest dir>/include/) - Library (
libCppUTestfrom<cpputest binary dir>/CppUTest/)
If the CppUTest extensions are used, libCppUTestExt from <cpputest binary dir>/CppUTestExt/ is added too.
The settings can be added to the whole project, or just to the Test Files. As a recommendation add those settings to Test Files only.
Add the include path to ...
Project / Test files properties -> C++ Compiler -> Include directories
Add the libraries to ...
Project / Test files properties -> Linker -> Libraries and Additional Library Directories.
Beside regular test source files, CppUTest requires a single test main. For the first, two C++ files are created:
- AllTests.cpp - test main
- ExampleSuite.cpp - test suite
Create a new C++ source file AllTests.cpp within the test directory. This file provides the main for the tests.
CppUTest doesn't run with verbose output by default. Therefore the verbose output must be enabled in order to provide enough information about the tests ran.
A possible way to do so is to extends the commandline arguments of main with -v.
AllTests.cpp
#include <vector>
#include <CppUTest/CommandLineTestRunner.h>

int main(int argc, char** argv)
{
    std::vector<const char*> args(argv, argv + argc); // Insert all arguments
    args.push_back("-v"); // Set verbose mode
    args.push_back("-c"); // Set color output (OPTIONAL)

    // Run all tests
    return RUN_ALL_TESTS(args.size(), &args[0]);
}
Note: This file is included in examples/cpputest and can be used as boilerplate for further test suites.
Create a second C++ source file ExampleSuite.cpp which will be filled with some simple examples.
ExampleSuite.cpp
#include <CppUTest/TestHarness.h>

TEST_GROUP(ExampleSuite)
{
};


TEST(ExampleSuite, testInt)
{
    int i = 3;

    CHECK_EQUAL(3, i);
}

TEST(ExampleSuite, testString)
{
    const char* str = "example";

    STRCMP_EQUAL("example", str);
    STRCMP_NOCASE_EQUAL("EXAMPLE", str);
}

TEST(ExampleSuite, testDouble)
{
    double d = 3.67;

    DOUBLES_EQUAL(3.64, d, 0.1);
}

TEST(ExampleSuite, testPointer)
{
    int i = 3;
    int *p2 = &i;

    POINTERS_EQUAL(&i, p2);
}

TEST(ExampleSuite, testWillFail)
{
    int wrong = 3;

    CHECK_EQUAL(762, wrong); // This will fail!
}
Note: For more information about writing tests with CppUTest, please refer to the CppUTest manual.
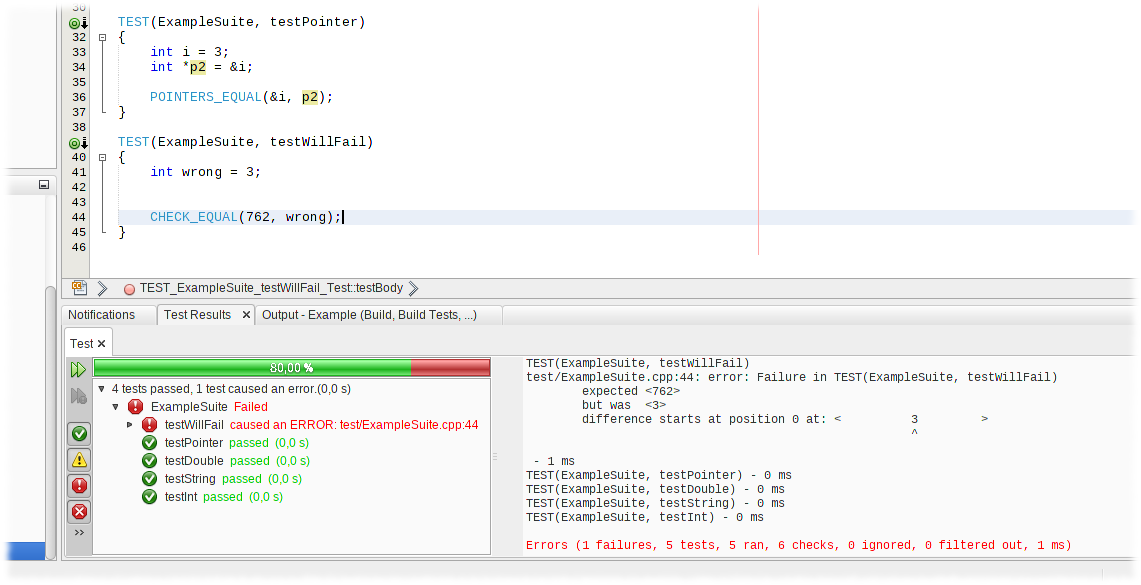
While the first tests should pass, the last one is intended to fail.
The are started by either clicking Test on the project, the test folder or pressing the shortcut.
If everything is ok, the tests are compiled and executed. Finally the test result window is shown (if not, a balloon-tip will appear; the result window can be set to show up per default after tests are exuted).
As expected the testcase testWillFail failed.
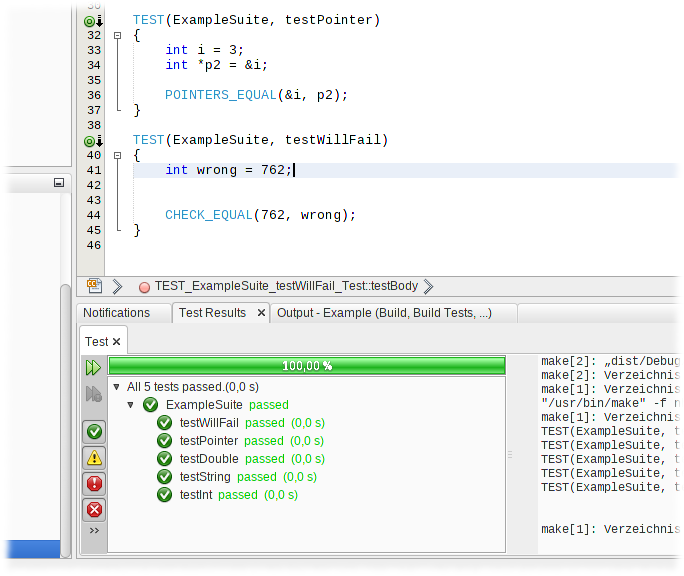
The "bug" needs not much to fix, change ...
TEST(ExampleSuite, testWillFail)
{
    int wrong = 3;

    CHECK_EQUAL(762, wrong); // This will fail!
}
to ...
TEST(ExampleSuite, testWillFail)
{
    int wrong = 762;

    CHECK_EQUAL(762, wrong); // Ok now
}
Running the test suite again will confirm that everything is ok now.
Add another C++ source file AnotherSuite.pp.
#include <CppUTest/TestHarness.h>

TEST_GROUP(AnotherSuite)
{
};


TEST(AnotherSuite, testOne)
{
    CHECK_TRUE(true);
}

TEST(AnotherSuite, testTwo)
{
    CHECK_FALSE(false);
}
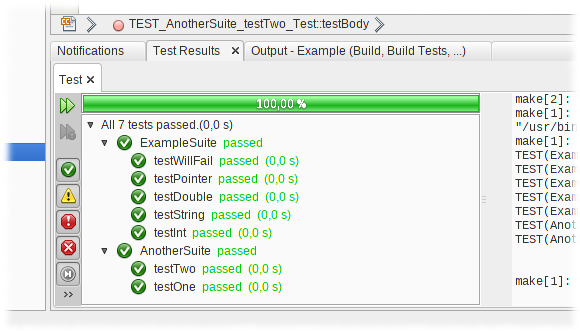
The new test suite is added automatically. Running the tests again will show the second suite. Every test passed!


