- A machine learning regression model that is trained on California Housing Prices dataset from the StatLib repository.
- We are doing supervised learning here and our aim is to do predictive analysis
- During our journey we'll understand the important tools needed to develop a powerful ML model
- Our aim is to play with tools like cross validation, GridSearchCV, Random Forests and Pipelines to reach our goal
- We'll evaluate the performance of each of our model using RMSE and also tune hyper parameters to further optimize our model
- We'll validate our predictions against our test dataset and conclude our learnings
- Understand the requirements of the business.
- Acquire the dataset.
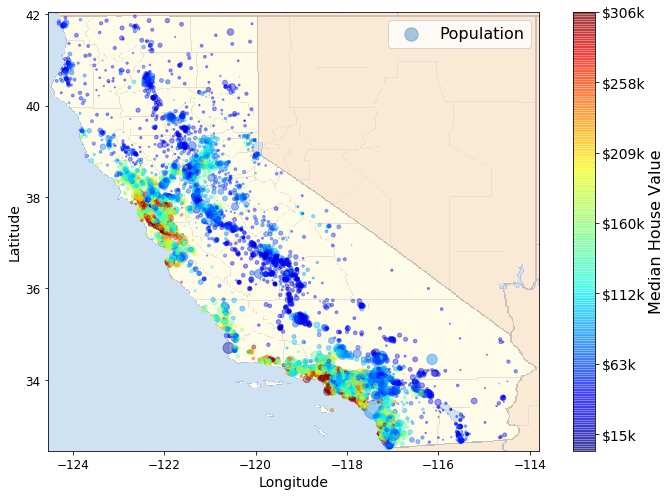
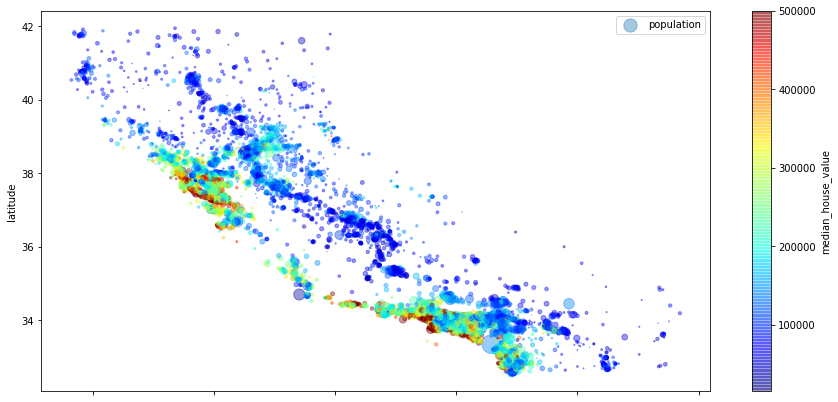
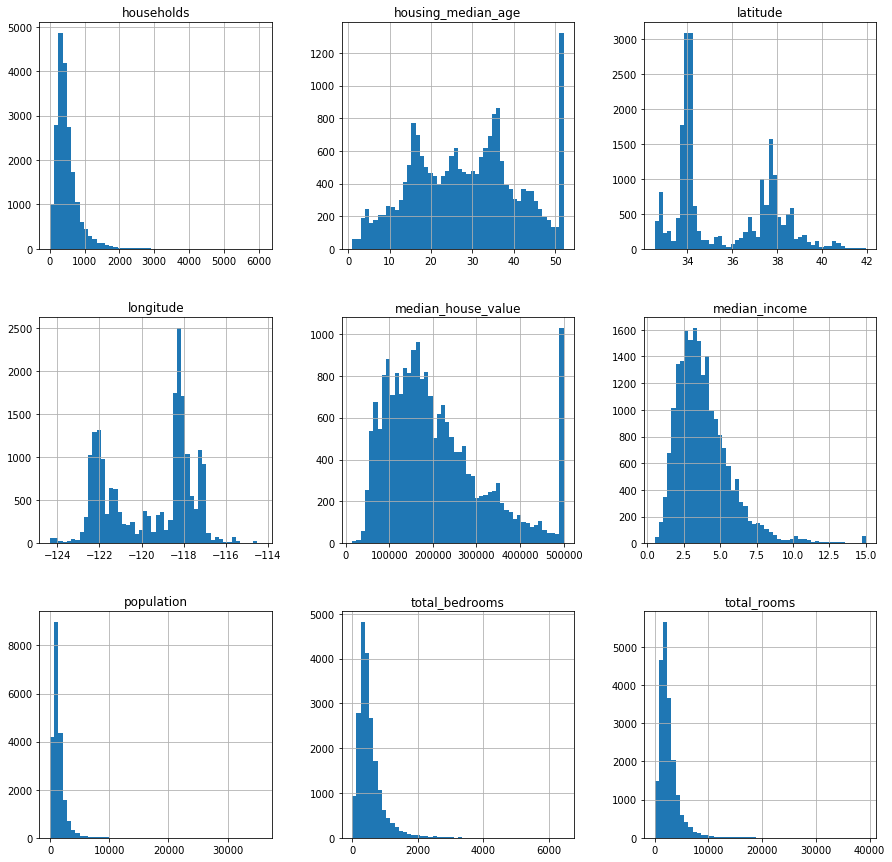
- Visualize the data to understand it better and develop our intuition.
- Pre-process the data to make it ready to feed to our ML model.
- Try various models and train them. Select one that we find best.
- Fine-tune our model by tuning hyper-parameters
- Present your solution to the team.
- Launch, monitor, and maintain your system.
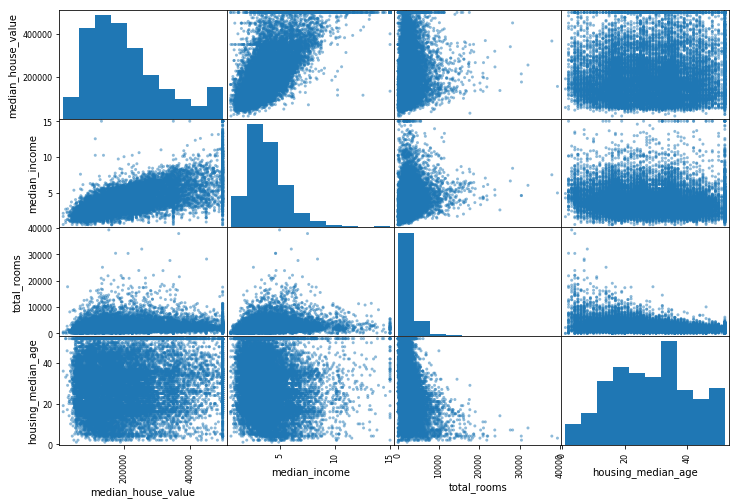
To find hidden patterns we'll analyze correlations among different attributes of our dataset.
First, you will need to install git, if you don't have it already.
Next, clone this repository by opening a terminal and typing the following commands:
$ cd $HOME  # or any other development directory you prefer
$ git clone https://github.com/gurupratap-matharu/machine-learning-regression
If you are familiar with Python and you know how to install Python libraries, go ahead and install the libraries
You can check which version(s) you have by typing the following commands:
$ python3 --version # for Python 3
- If you don't have Python 3, I recommend installing it (Python ≥2.6 should work, but it is deprecated so Python 3 is preferable).
On Linux, unless you know what you are doing, you should use your system's packaging system. For example, on Debian or Ubuntu, type:
$ sudo apt-get update
$ sudo apt-get install python3
When using Anaconda, you can optionally create an isolated Python environment dedicated to this project. This is recommended as it makes it possible to have a different environment for each project (e.g. one for this project), with potentially different libraries and library versions:
$ conda create -n venv python=3.5 anaconda
$ conda activate venv
This creates a fresh Python 3.5 environment called venv (you can change the name if you want to), and it activates it. This environment contains all the scientific libraries that come with Anaconda. This includes all the libraries we will need (NumPy, Matplotlib, Pandas, Jupyter and a few others), except for TensorFlow, so let's install it:
Great! You're all set, you just need to start Jupyter now.
You can start Jupyter, simply type:
$ jupyter notebook
This should open up your browser, and you should see Jupyter's tree view, with the contents of the current directory. If your browser does not open automatically, visit localhost:8888.
Great! We are all setup to do some data science and machine learning!
I would like to thank Aurélien Géron and his wonderful book Machine Learning with ScikitLearn and TensorFlow. I highly recommend this book.
 At the end of our project we'll be able to derive insights to present to our team.


