In this project, we proposed a method for breast cancer classification. We can do classification on CPU, GPU or even Raspberry Pi with Intel NCS2.
Here is how we train our CNN:
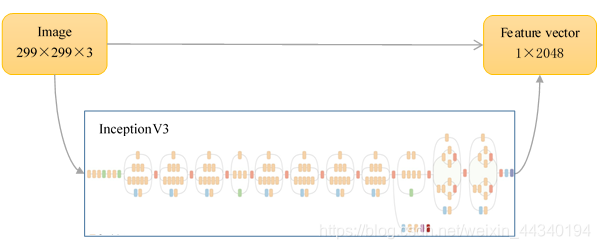
In our CNN, InceptionV3 is imported as a feature extractor. It is used to preprocess our data which comes from BreaKHis, a public data set available at http://web.inf.ufpr.br/vri/breast-cancer-database. It contains 7909 breast cancer images.
InceptionV3 is a powerful image classification CNN provided by Google. In our project, we use InceptionV3 as a feature extractor. It will tranfer an image to its feature vector. This process is called "preprocess".
After preprocessing, all the feature vectors (.txt) are stored in a new folder called "bottlenecks".
Next, we take 80% of the .txt files randomly as our training data and the left 20% as testing data. We put them respectively in two new folders named "train" and "test". In the "test" folder, there are 4 folders named "40x", "100x", "200x" and "400x". This is to make testing operation easier.
Finally, these feature vectors are loaded. After training and testing, you'll get a .pb model in a new folder named "output".
After training the model, you can try to do prediction with it.
Furthermore, if you've installed OpenVINO, you can try to do inference on your CPU, GPU or Intel NCS2. In this way, you can realize breast cancer classification on a raspberry pi with an Intel NCS2.
| python | 3.6 |
|---|---|
| tensorflow / tensorflow-gpu | 1.13.1 |
| RAM | 32GB |
1.Download run.py and predict.py and put them in a new folder. Let's call this folder "project folder".
2.Download BreakHis data set from http://web.inf.ufpr.br/vri/breast-cancer-database. Put all the 7909 images in a folder called "data set". Move this folder into your project folder and make sure there is nothing else except breast cancer images (but images can be put in sub-folders).
3.Download googlenet-v3.frozen.pb and put it in a sub-folder called "InceptionV3". Now your project folder is ready.
Just run run.py and be patient. The time cost depends on your device.
After the program is finished, you'll get a BC-Classifier.pb in a folder called "output". This is your own model!
Run predict.py. You need to enter the directory of your model and the image to be predicted. By default, the directory of model is "cwd\output\BC-Classifier.pb" and of image is "cwd\image to be predicted\image.png". "cwd" means current work directory, which should be your project folder.
1.You need to know how to start with Intel Neural Compute Stick2. Here is the official guide:https://software.intel.com/zh-cn/articles/get-started-with-neural-compute-stick.
2.You need to know how to transfer your .pb model to IR files. Here is the official guide:https://docs.openvinotoolkit.org/latest/_docs_MO_DG_Deep_Learning_Model_Optimizer_DevGuide.html
3.Next, you need to know how to run "Hello Classification C++ Sample" with the IR files you get. Here is the official guide:https://docs.openvinotoolkit.org/latest/_inference_engine_samples_hello_classification_README.html
Now you have done prediction on Intel NCS2. You can even do prediction on Raspberry Pi with a NCS2 in this way. Here is the official guide:https://docs.openvinotoolkit.org/latest/_docs_install_guides_installing_openvino_raspbian.html
In our project, we proposed a method for breast cancer image classification. It can be done on CPU, GPU or even Raspberry Pi with Intel NCS2. However, if we change the data set when we train our model, we can classify other image data sets. So our method can be tried on any image classification tasks and I hope the result be satisfactory.
