-
Notifications
You must be signed in to change notification settings - Fork 2
Home
See the README for general information about features and dependencies.
In order to install this module you must first install all of the dependencies. Libraries are expected to be located within the [your drupal site]/sites/all/libraries directory as specified by the Libraries API. Once dependencies are met, this module is installed in the same manner as other Drupal modules.
This module requires the typical configuration of user permissions, as well as, a administration of phenotyping projects, traits and users. Both will be described below.
This module provides two permission checkboxes on the Drupal User Permission page (Administration Toolbar > People > Permissions).

The first provides access to the summary, upload and instructions pages whereas the second provides access to the download page. I suggest creating two roles (e.g. "Phenotype Access" and "Phenotype Download"), each with one permission to allow you to specify that some users can upload the data but not download it.
NOTE: These permissions alone do not allow a user to upload/download data. They need this permission in addition to being added to a given Phenotyping project through the Raw Phenotypes "Manage Projects" administrative UI.
To manage projects, click on the configure link to the right of Raw Phenotypes on the module page and then click on "Manage Projects". This module uses existing Tripal/Chado Projects as a base and then provides an administrative interface for assigning essential and/or optional traits and users to a pre-existing project. Thus, to add a project to the various raw phenotypes pages, you go to "Manage Projects", select an existing Tripal/Chado project from the dropdown and click "Create Project".

NOTE: This will not create a new Tripal/Chado project, nor will it visibly alter the existing Tripal Project node. All it will do is add an internal record that this project will have raw phenotypic data and should be made available through the Raw Phenotypes "Manage Projects" configuration page.
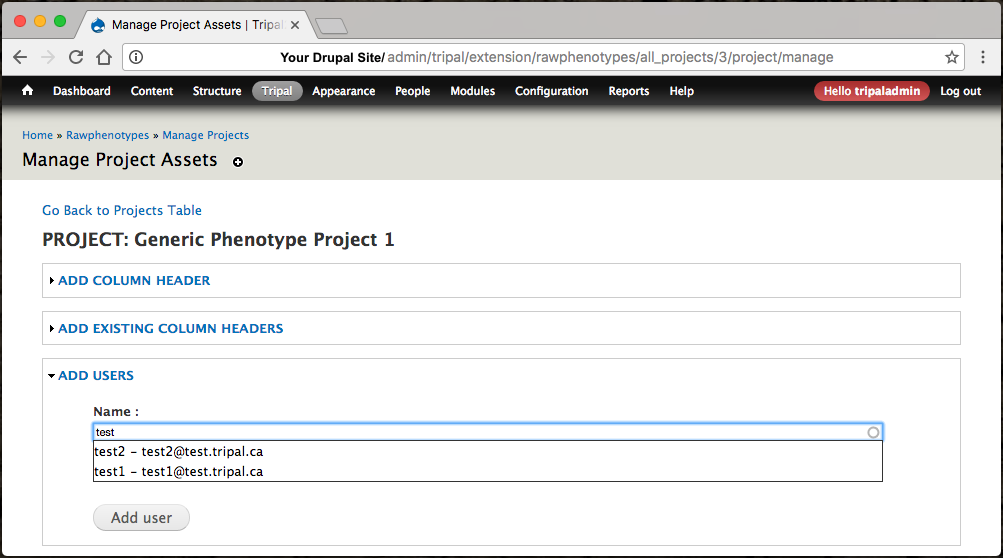
In addition to giving users permission to the Phenotyping pages as you did in Step #1, you also need to assign them to projects. This allows you to control who uploads/downloads data for each project and also ensures that users don't have to scroll through a long list of projects they are not involved in. First go to the "Manage Projects" page (Admin > Tripal > Extensions > Raw Phenotypes > Manage Projects) and click on the name of the project you wish to give users permission to. This will bring you to the Phenotyping Project Administration page where you can add both users and traits (See Step #4).

Next, expand the "Add Users" fieldset and search for the name of the user you would like to add. Select the user's name from the autocomplete box and click "Add User". The user has now been given permission to the project and provided the have the "Access" permission in Step #1, they will now see this project listed on the Upload, Backup and Instruction pages. Furthermore, if they have the "Download" permission in Step #1, they will also be able to choose this project on the download page.

The Raw Phenotypes module considers each column header in the data collection spreadsheet a "Measurement". In some cases these might map to a trait (e.g. Lowest Pod Height) but often they might not (e.g. Comments) or at least not in a one-to-one relationship (e.g. Plant Height (1st) and Plant Height (2nd) to indicate two measurements which will later be averaged).
By default, the module will add Planting Date as well as the plant properties "Name","Entry","Location","Plot","Rep" to uniquely identify the plants being phenotyped. To add additional traits, click on "Add Column Header", enter the required information and click "Add Column Header". Each measurement should include details of how to record it, units and definition to help data collectors and these details will be displayed on the instruction page. Furthermore, since the unit is included in the unique name, this system can support data for the same trait being collected via different methods or scales and correctly keep the data separate.

Note: The "Name", "Trait Rep/Stages", and "Unit" will be combined to form the column header in the data collection spreadsheet. While you want it descriptive and unique, keep in mind the restricted space on a data collection tablet.
Once you have added a measurement to one project, you can re-use it for additional projects making the same measurement by expanding the "Add Existing Column Headers" fieldset and selecting the checkboxes beside measurements you want to re-use. By default these measurements are set as optional but if you'd like them to be essential simply click the "Essential?" checkbox as well. This makes it much quicker to set up multiple projects measuring similar things.