This is an example mod that displays how to add a custom robe and relic. For the sake of the tutorial, neither will be too complex; this is more about showing off the actual addition of the items than the coding of them. In the future, I will update this with more in-depth explanations of adding content.
LegendAPI, the system used to add relics and robes, was made by RandomlyAwesome. All credit to them for it. The boilerplate folder setup was made by Timesweeper. All credit to them for initial project setup.
You will need BepInEx, the HookGenPatcher (found in the Wizard of Legend discord server), and LegendAPI 1.2.0 or later for this tutorial. Please follow instructions provided with each of these for installation.
We will do the following:
Add one robe Add one relic Display my traditional way to load sprites
Traditionally, people load AssetBundles to load assets into the game. This is good for people who have experience with Unity, but it can also make for slower development times. I will make a second tutorial outlining this approach to asset loading.
Instead, for this tutorial, I will use a system I developed that loads sprites directly from files. You will copy the "TemplateSprites" folder into your Plugins folder, and will distribute this sprite folder with the mod dll. Ideally, you'll rename the folder (and the folderName constant in ImageHandler.cs) to something else so your folder is differentiated from others.
The folder layout is based on the WolMod template from Timesweeper's Github. You will need Visual Studio Community, Wizard of Legend 1.23.4A, and BepInEx installed onto your Wizard of Legend game. Additionally, get the newest version of LegendAPI from https://wizard-of-legend.thunderstore.io/.
Assuming you have done the above things, start by cloning this repository. Go inside a couple folders and find WoLMod.csproj and open it. Look at WoLModPlugin.cs in there, and you will see the basis of every mod:
[BepInPlugin("com.AuthorName.ModName", "ModName", "0.1.0")]
public class WoLModPlugin : BaseUnityPlugin {

    void Awake() {

    }
}
The first line is the line that dictates what the mod's name is for the modloader, alongside the author and version. The second line establishes that this is the actual file that starts the modloading. Think of it like Program.cs. You'll put the loading itself in Awake(), like I will display in a minute.
Are you ready to continue? Good. Now it's time to define a new robe using LegendAPI.
Robes are pretty easy. First, you define a new "OutfitInfo" instance. Then, you set it's name field to a name. This is the display name, whereas in a minute you will define the internal name.
After choosing a name, it's time to create the Outfit itself. You can create custom robe effects, but that takes much more effort and understanding of Wizard of Legend, so for now we will stick to basic stat changes.
OutfitInfo outfit = new OutfitInfo();
outfit.name = "Cool Guy";
outfit.outfit = new Outfit("ModName::OutfitName", 1, new List<OutfitModStat>()
{
     new OutfitModStat(OutfitModStat.OutfitModType.Health,100,0,0,false)
}, false, false);

Outfits.Register(outfit);
We are doing a lot in this code block, but we can easily break it down. The first line created a blank OutfitInfo for us to use. The second line sets the name. The third line is us establishing the new Outfit.
The first part, the "ModName::OutfitName", is the internal name. To avoid mod conflicts, please change ModName to the name of your mod, and OutfitName to your Outfit's name. The second value, the number 1, is the Palette ID. The Palette ID determines what color the robe will be. There are 32 in the base game, but for our purposes try to stick to numbers 0-19. (Yes, a way to add custom palettes exists, but it's not part of LegendAPI, and is more complex.)
The new List<OutfitModStat>() is the biggest point of confusion. What we're doing here is establishing a list of all the stat changes; in this case, we are only using two. The list goes in between the {} you see.
new OutfitModStat(OutfitModStat.OutfitModType.Health,100,0,0,false)
The OutfitModStat.OutfitModType.Health part tells the game what stat to modify. There are several options, but you can see those for yourself. The next three numbers are, in order, additive changes to the stat (i.e. adding a flat amount of max health), multiplicative changes (increasing speed by 20%), and overwrite changes (outright setting a value to 1). The last value is boolean and can be avoided for the sake of the tutorial.
After all the OutfitModStats are outlined, the last two values are a pair of false booleans. The first one lets the program know you need to buy the robe at Seville; if it was True, you would start with it unlocked. The second has to do with robe leveling.
Lastly, the final line tells LegendAPI to "Register" this OutfitInfo, so that it will be added to the game. Build the mod (F6), copy the final dll from your Bin -> Debug folder, boot up Wizard Of Legend with it copied into your Plugins folder, and you should see this robe:
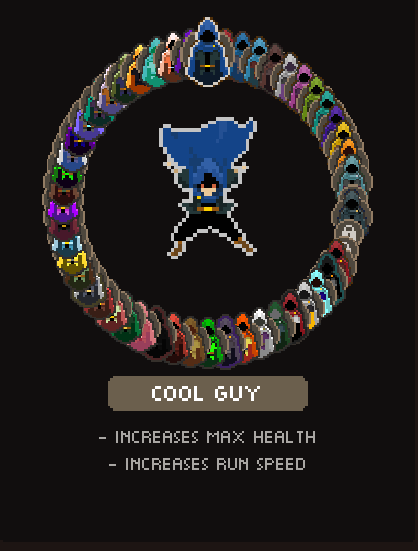 All the other robes are from my other mods.
This allows us to move on to the Relic.
Relics are much more complex than robes. Since they require creating an entirely new class, going over the ins and outs of one will take more time. In general, the addition of a relic is the same as a robe, in that you define an Info and register it.
ItemInfo item = new ItemInfo();
        item.name = "Super Necklace";
        item.text = new TextManager.ItemInfo()
        {
            itemID = NewDamageUp.staticID,
            displayName = "Super Necklace",
            description = "Increases damage greatly!"
        };
        item.tier = 1;
        item.priceMultiplier = 1;
        item.icon = ImageHandler.LoadSprite("Super Necklace");
					item.item = new NewDamageUp();
        Items.Register(item);
This one's longer though. First off, the name is going to be the internal name.
TextManager.ItemInfo is a little bit weird. Start with the display name and description. Those are also pretty obvious. The itemID is a bit more complex, in that it is asking for the internal ID for the item. Luckily for us, the item class always has a staticID that we can point to.
public static string staticID = "ModName::NewDamageUp";
Once again, replace ModName with the mod name, and use that every time to avoid conflicts. For the rest of it, you can pick what you want, but I would use the class name. We will talk about the rest of the class in a minute.
The tier and price multiplier have to do with various shops. If you're ever unsure of either, set them to 1 and 1 respectively, like I did above. The tier math is very confusing, so I won't go into it here, but when buying relics in the shop during a run, the base price is multiplied by the multiplier, so raise the multiplier if the relic is stronger.
This brings us to the icon. Remember how I said I made a custom class to handle sprite loading? Yeah. It looks in the folder for an image with the specified name; in this case, it is "Super Necklace" (It takes no file extension, but requires that you use a PNG file). Relic sprites are traditionally 16x16. If you want to add another sprite, create another PNG file, name it whatever, and use "ImageHandler.LoadSprite("FileName")" to get it.
After that, you create a new instance of your item, so that the game can point to it when it comes time to give the player said item.
Lastly, the mod registers the relic so it will appear in-game.
I could go over every little detail of the NewDamageUp class, but instead, since most of it is obvious, I'll include the highlights.
public NewDamageUp()
	{
		this.ID = NewDamageUp.staticID;
		this.category = Item.Category.Offense;
		this.damageMod = new NumVarStatMod(this.ID, 1.0f, 10, VarStatModType.Multiplicative, false);
	}
This is the constructor at the top of the file. This sets the individual instance's ID to the static ID, tells the game to put this in Mimi's Offense category, and sets the damage mod. This looks a lot like the OutfitModStat from before. It requests (in this order) an ID string (which we kindly gave it the same ID as the relic), the modifier amount, the priority in the list of modifiers, and the type of modifier (Is it additive, multiplicative, or an overwrite?). The final value, when set to true, will set values like health to their new maximum when modified.
public virtual void SetModStatus(bool givenStatus)
	{
		StatManager.ModifyAllStatData(this.damageMod, this.parentSkillCategory, StatData.damageStr, new StatManager.ModApplyConditional(base.IgnoreStatusConditional), givenStatus);
	}
This line tells the game to modify the damage stat using the damage modifier created earlier, and to toggle it on or off based on if the item is being added or removed.
Collectively, this will all combine to make a fully functional relic and outfit.
Help! The relic isn't showing up ingame.
Did you add the TemplateSprites folder to your Plugins folder? If not, try that.
Help! I tried adding another outfit/relic, but something isn't working, and it isn't showing up/is replacing another outfit/relic.
Did you make sure to change the ID/internal name in ALL places, and to make sure it isn't conflicting with any other mods? If not, do those, and ask for help if it still isn't working.
This should be enough to go off of. Assuming you understand C#, and have the ability to understand the vanilla game's code, you should be able to use this knowledge to make some simple items.
As promised, more updates to the tutorial will come over time, as I get more example items and outfits together.
Good luck.