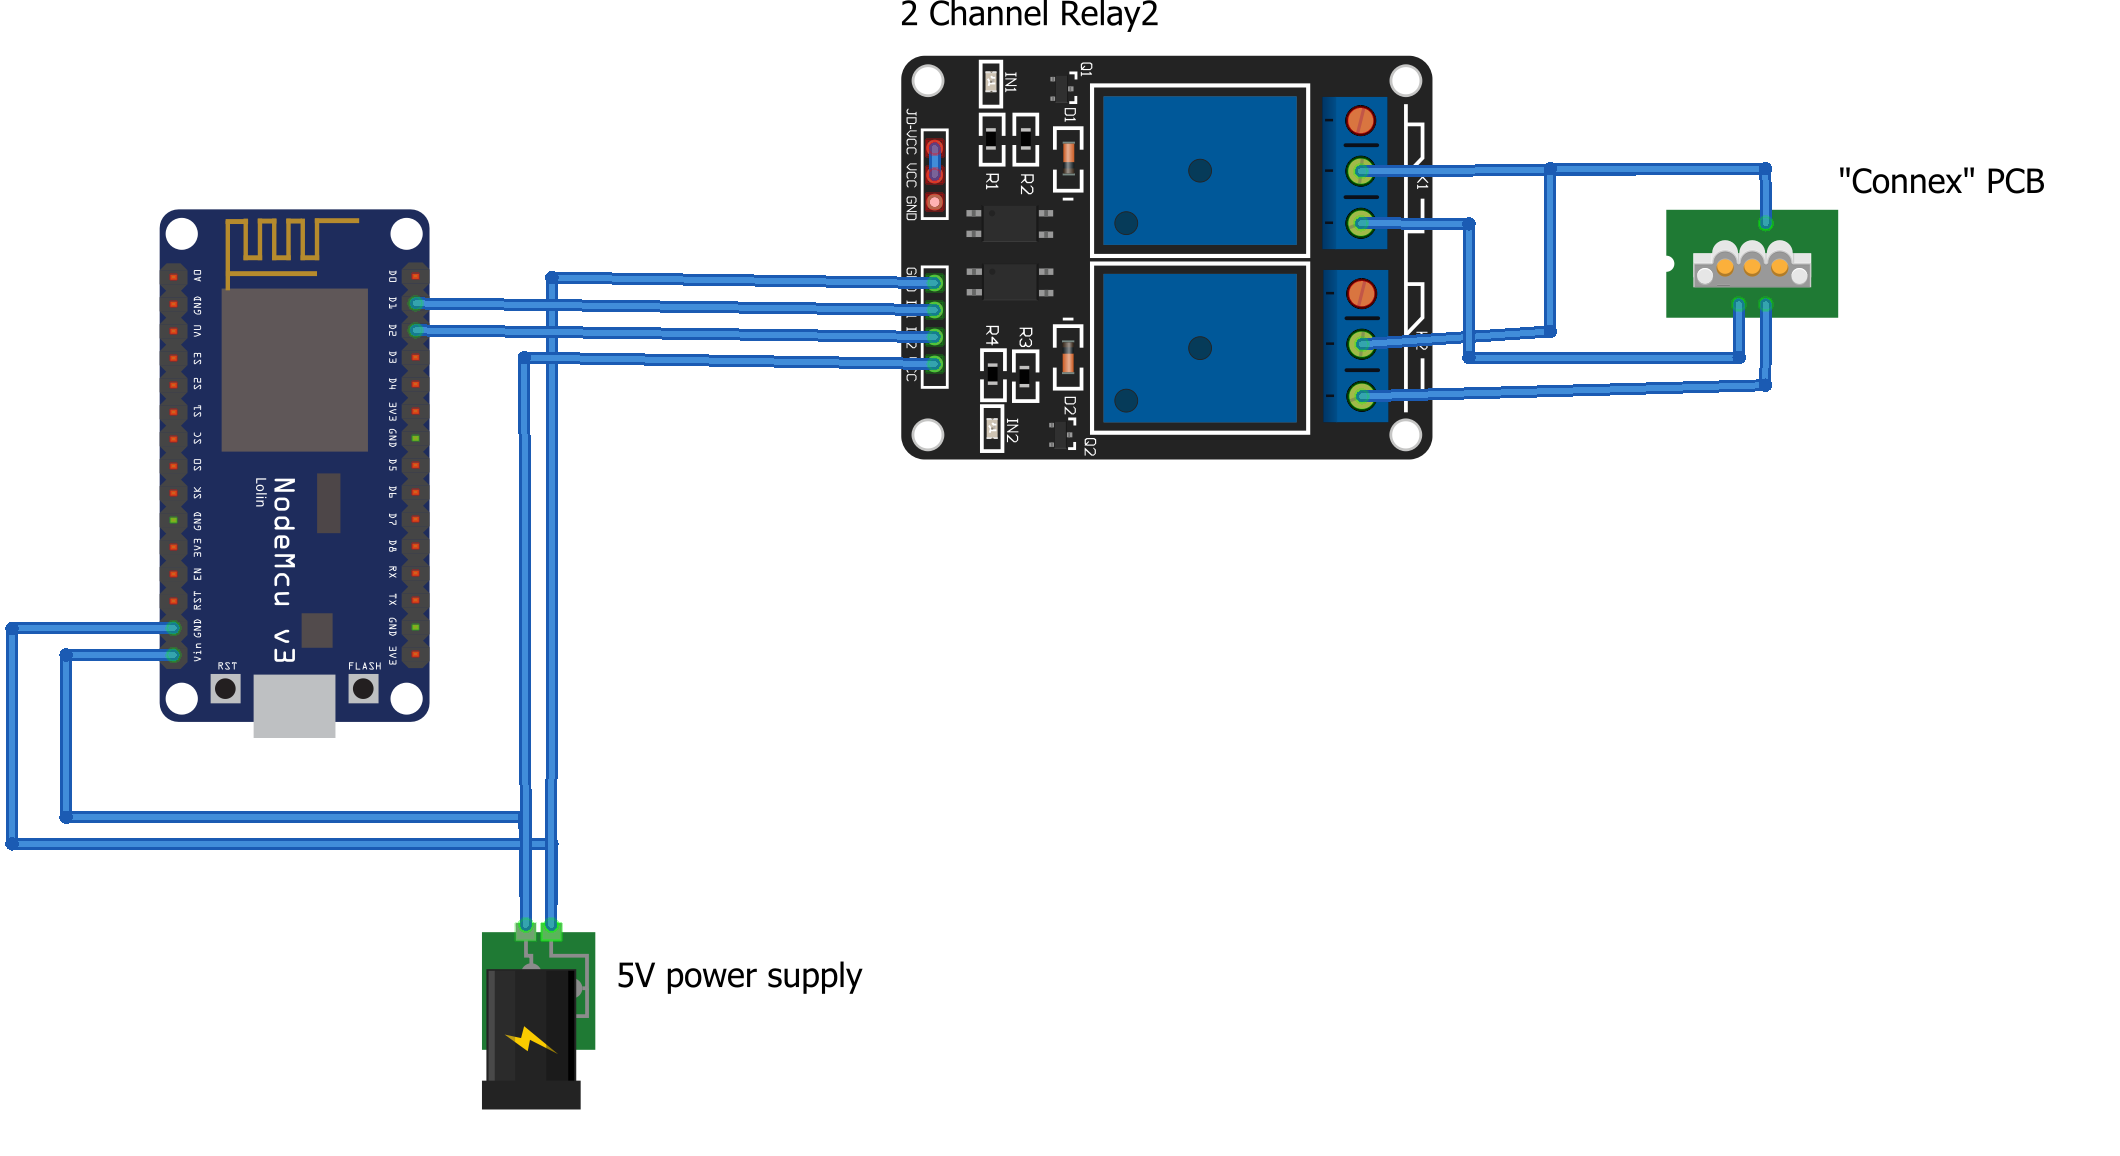
This is a simple project which lets you open and close your garage door using a Sommer garage door opener, an ESP8266 flashed with ESPHOME and Home Assistant. In order to controll the garage door opener from the company Summer, I bought the "Connex" addon PCB which extends the wall controller with two inputs. The "Connex" PCB is providing 24 VDC as an outlet for the inputs, therefore I connected the GPIO pins of the ESP8266 to a relay which is then connected to the "Connex" PCB.
- NodeMCU V3 (or any other ESP device which is supported by esphome)
- 5V Power supply
- 2 Channel relais
- 4 cables (to connect relay with pi)
- 3 cables (to connect relay with Connex PCB)
- garage door opener pro+ (Sommer)
- Connex adaptor (Sommer)
- firmware created with ESPHOME
Inside the wall controller there is certian place for a battery pack. Due to the fact that I don't use the battery I used this space to place the NodeMCU and the relay to. I cut a thin (3mm thick) wood plate so that it fit in that space and mounted the NodeMCU and the relay onto the plate. The plate is then fixed with double sided tape into the housing. Before I fixed the plate in the housing I did the wiring from the NodeMCU to the relay and from the relay to the Connex PCB. I used pins D1 and D2 to connect to the relay. If you use other pins, please adapt them in ESPHOME.
Copy the garagedoor.yaml to your /config folder from ESPHOME, adapt the IP address or remove the static IP, compile and transfer the firmware by hitting the 'Install' button. After the NodeMCU is up and running open your Home Assistant UI, go to 'Settings --> Integration' and add a new ESPHOME device by either putting in the IP address of the NodeMCU or putting in garagedoor.local. Now you should see one device with 9 entities which you can add to your lovelace UI.
